How to manage SQLite databases on a Linux server with Coolify and Lite Queen
Published on Sep 25, 2024
Last updated on Nov 11, 2024
Update: As of Coolify v4.0.0-beta.361, Lite Queen is included in Coolify and can be installed in one click.
In this guide we're going to manage SQLite databases on our VPS by hosting Lite Queen with Coolify. What is Coolify you ask?
Coolify is an all-in one PaaS that helps you to self-host your own applications, databases or services (like Wordpress, Plausible Analytics, Ghost) without managing your servers, also known as an open-source & self-hostable Heroku / Netlify / Vercel alternative.
-
First off, we need to deal with installing and setting up our Coolify instance in our VPS.
-
Let's create a new Project and a Docker Compose Resource inside.
-
Let's add our Docker Compose configuration for the Resource:
 services:
  lite-queen:
    image: 'kivsegrob/lite-queen:latest'
    volumes:
      - '/home/testuser/www:/www'
      - '/home/testuser/litequeen-data:/home/litequeen/data'
    labels:
      - caddy_0.basicauth.0_testuser=$2a$14$XXoxLTSzzVgMFzn.xTVMQeJzMPpnmPNvRYic4dGMeUmwiNL1y9nHq
Let's go over the configuration:
/home/testuser/www:/www: location of the sqlite databases in our server. Inside the Lite Queen container these will be accesible in/www(you can change this to another path if you wish)./home/testuser/litequeen-data:/home/litequeen/data: This is needed to persist the data of Lite Queen. By default the data is stored inside/home/litequeen/data.caddy_0.basicauth.0_testuser=$2a$14$XXoxLTSzzVgMFzn.xTVMQeJzMPpnmPNvRYic4dGMeUmwiNL1y9nHq: Here, we're adding basic auth with Caddy to protect the our Lite Queen instance. In Coolify, we configure Caddy using the caddy docker proxy inside labels.
-
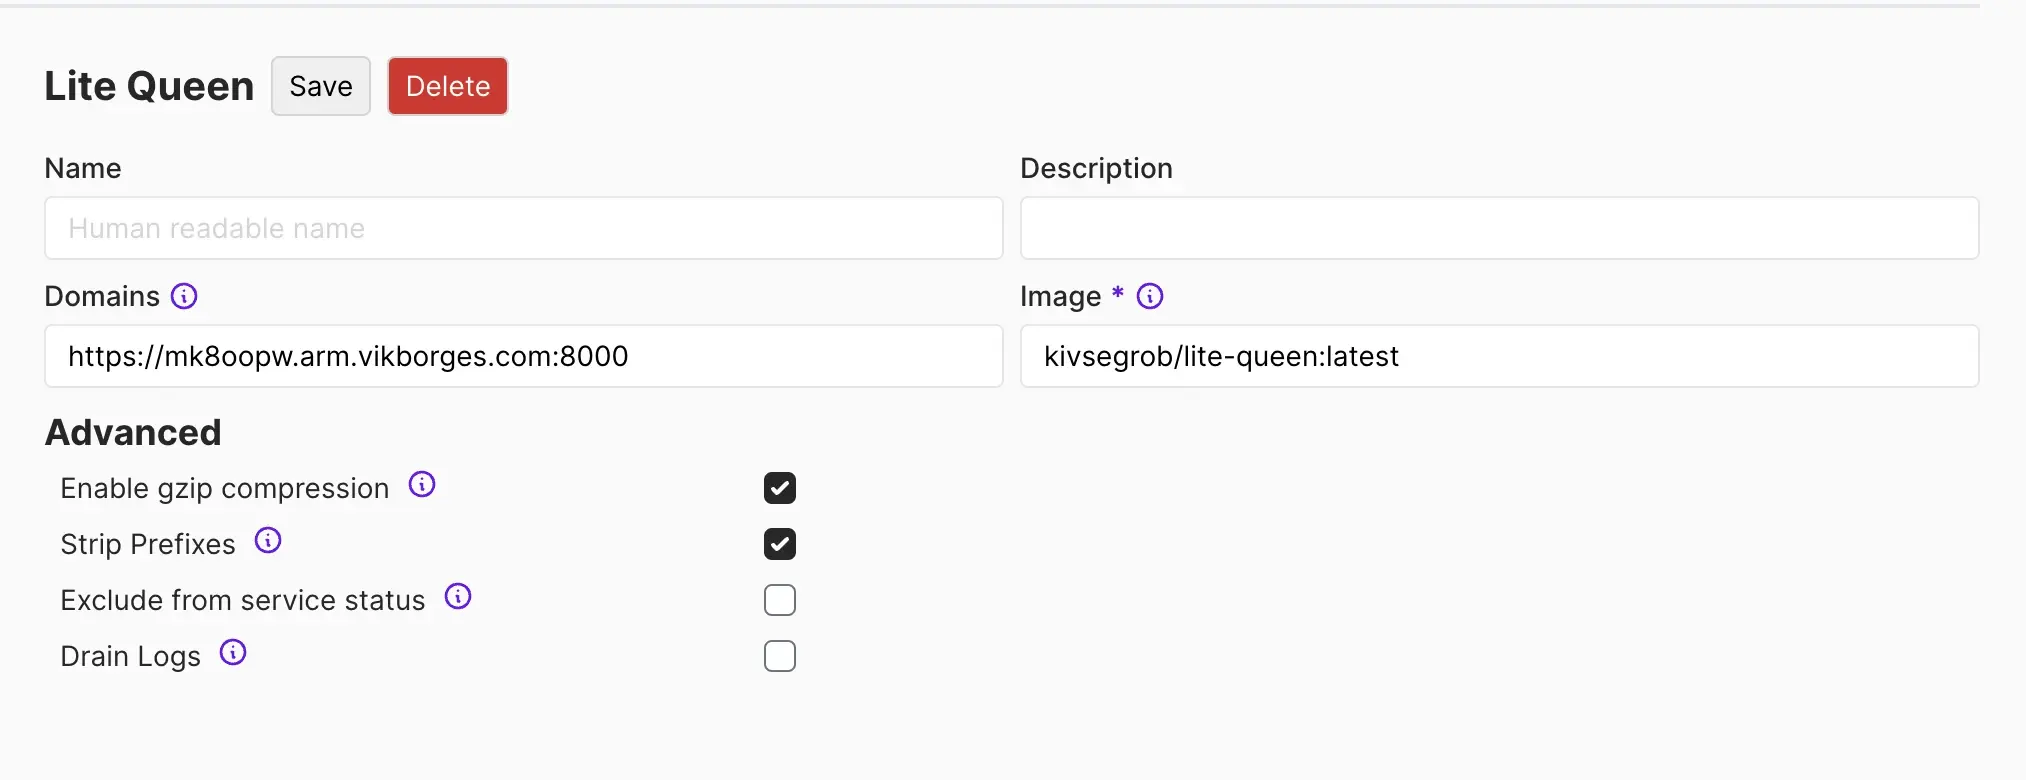
Let's add a domain and connect it to our Lite Queen container
-
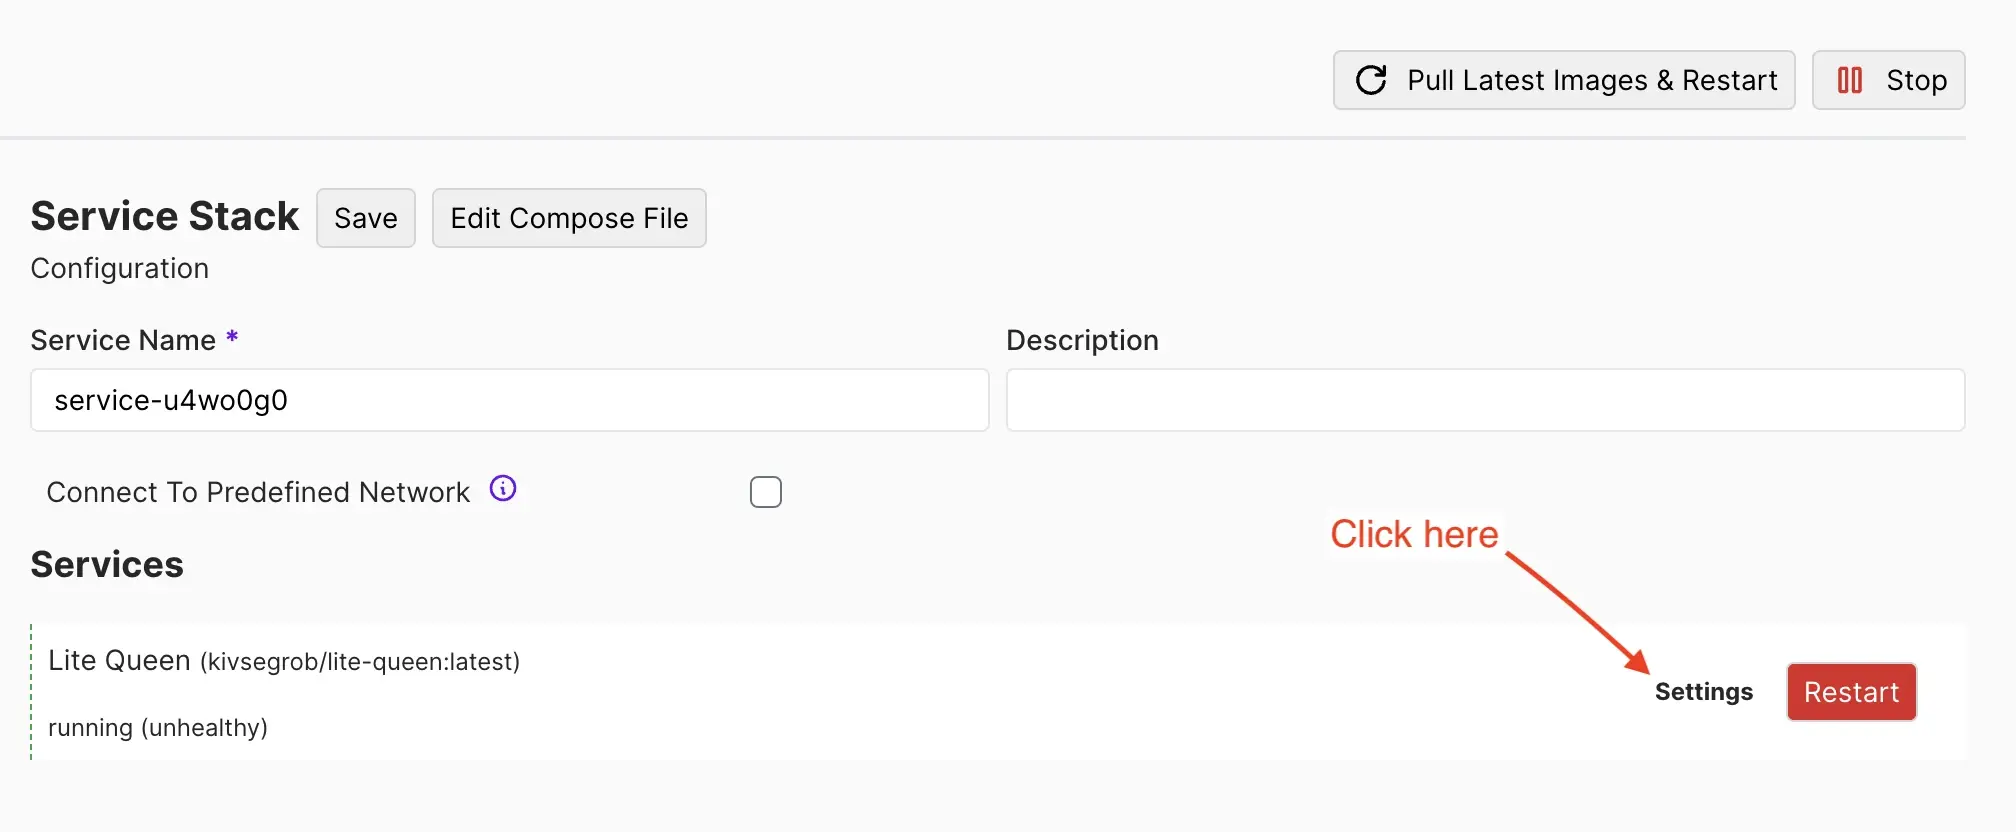
You can set the domain by going to the
Settingsin the service: -
Let's map our domain to the port 8000 in the Lite Queen container(port used by default). This is done by putting the domain, followed by a semicolon and then the port 8000.
-
-
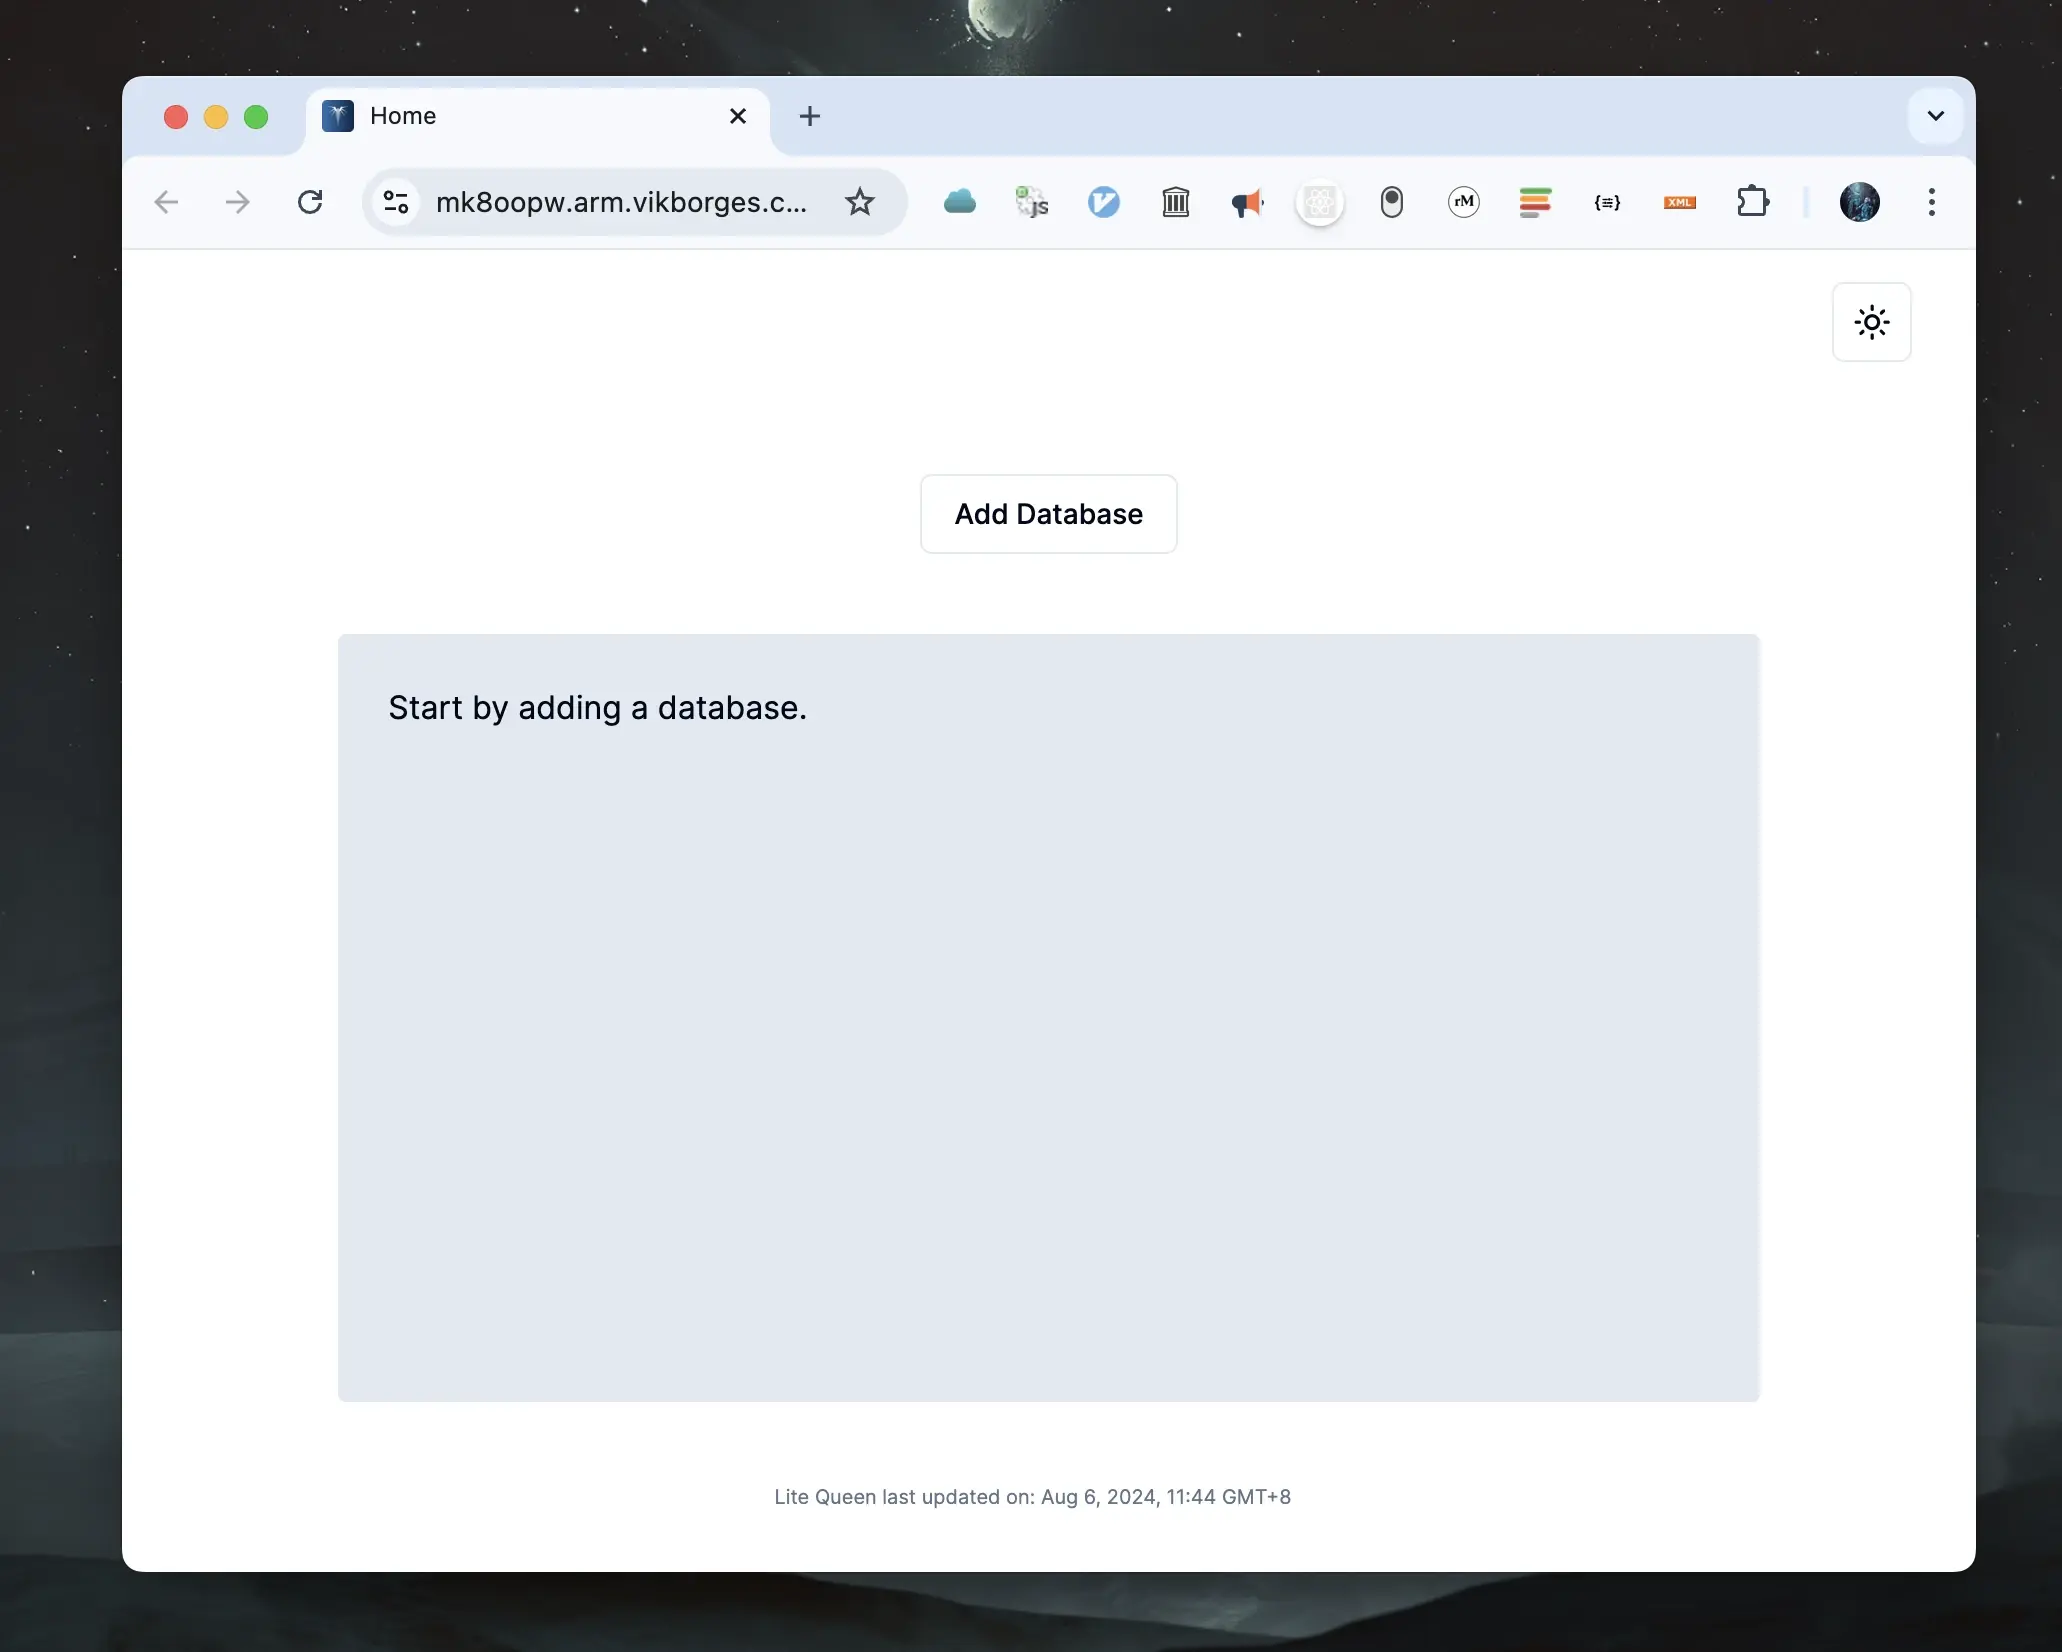
After saving and reloading the configuration(Pull Latest Images & Restart button), you should be able to see the initial screen of Lite Queen. Happy Hosting!


